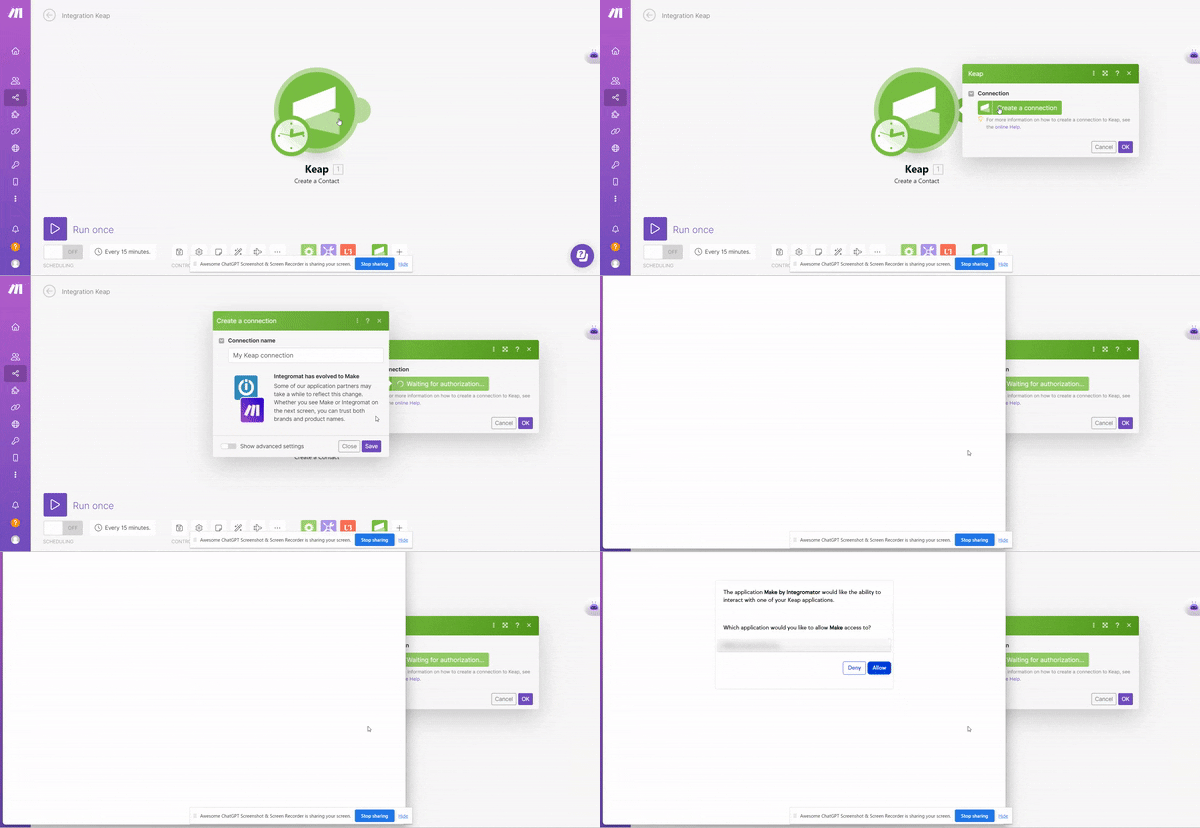
Prerequisites:
- Ensure you have an Infusionsoft account. If you don’t, you can sign up at signin.infusionsoft.com/registration/createInfusionsoftId.
Note: Fields highlighted in bold within the Make scenario are essential and must be filled out.
Connection Process:
-
- Access the Make Dashboard: Log into your Make account.
- Start a New Scenario: Click on the ‘Create New Scenario’ button, typically found at the top right corner of the interface.
- Locate the Infusionsoft Module: From the modules list, choose the Infusionsoft module.

- Initiate the Connection: A ‘Create a connection’ dialog will appear. Interact with this option to proceed.
- Define Connection Name: Input a suitable name in the ‘Connection name’ field for easy identification later on.
- Provide Infusionsoft Credentials: You’ll be prompted for your Infusionsoft email and password. Ensure you enter these details accurately, and then click ‘Log In’.

- Grant Permissions: A permissions prompt will appear. Once you’ve reviewed the permissions Make requests, click the ‘Allow’ button to grant access.
- Complete the Process: To finalize your settings, always make sure you click the ‘Save’ button, generally situated at the screen’s base.
With these steps completed, your Infusionsoft (Keap) account is now integrated with Make, granting you the ability to efficiently create, modify, and manage various entities such as contacts, orders, tasks, and much more, directly from the platform.


