Prerequisites:
- Firstly, make sure you have a Zoom account. If not, you can quickly sign up at zoom.us/signup.
Easy Connection Steps:
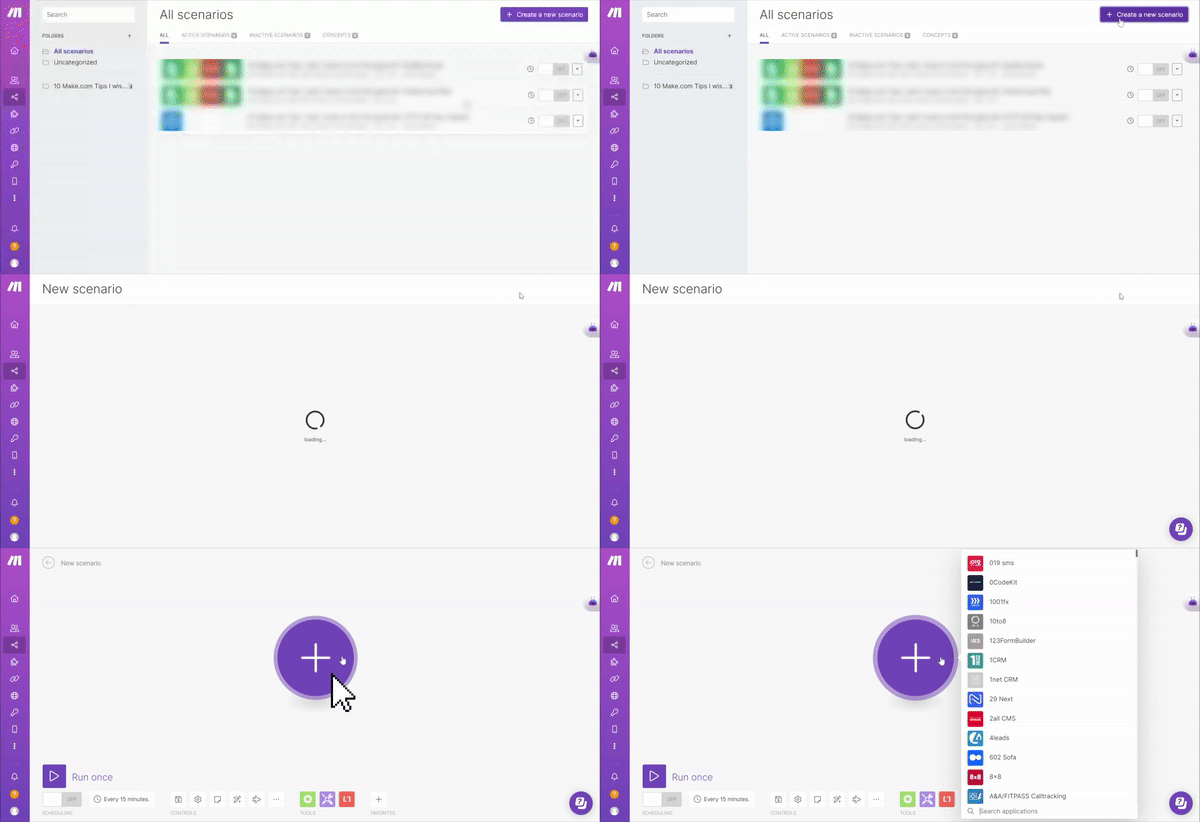
- Enter the Make Dashboard: Start by logging into your Make account.
- Set the Scenario: Once in, click the ‘Create New Scenario’ button, typically found at the top right.

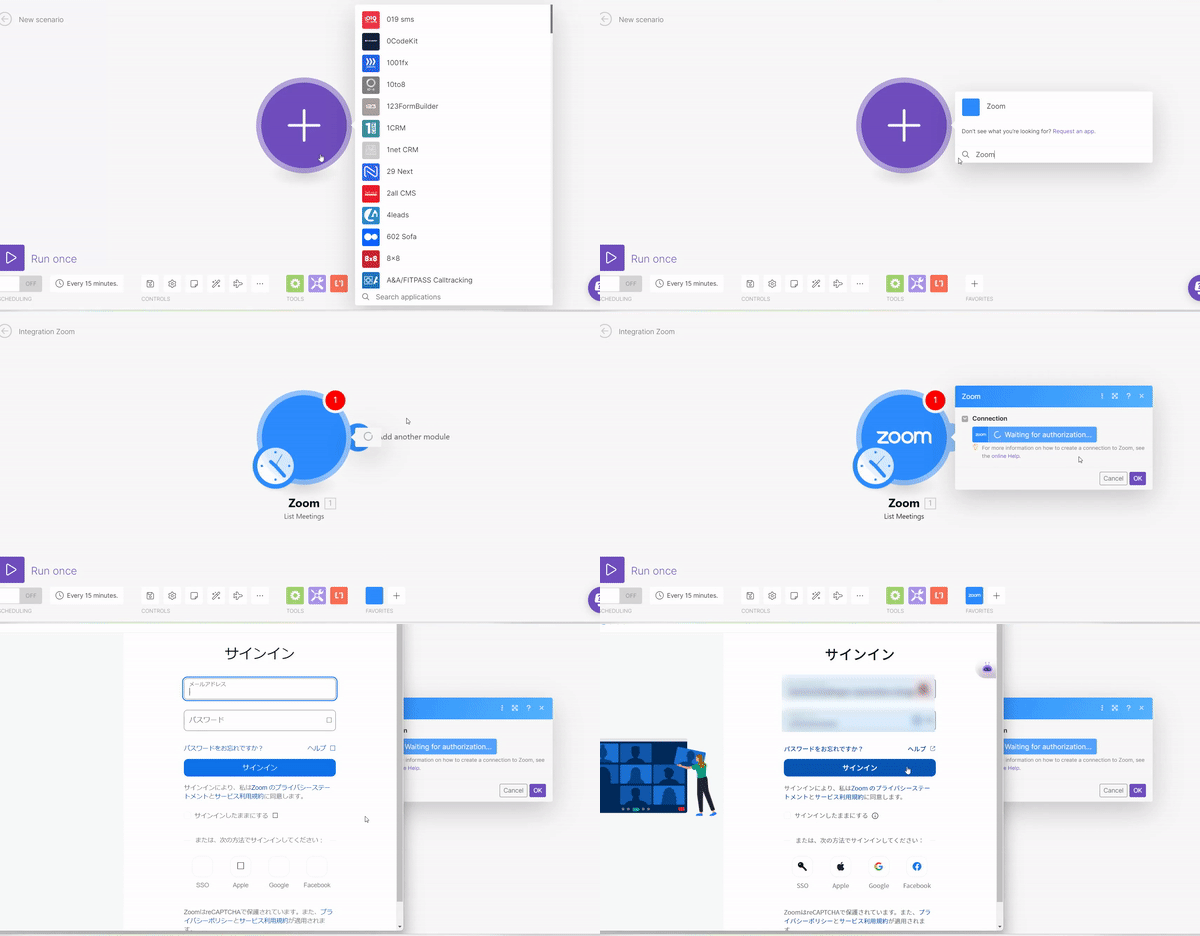
- Add the Zoom Module: Navigate through the available modules and select the Zoom module.
- Begin the Connection: Click on ‘Create a connection’.
- Note: If you happen to choose a module labeled with an ‘instant’ tag, then first click on ‘Create a webhook’ followed by ‘Create a connection’.
- Name the Connection (Optional): For easy recognition later, you can label this connection. Use the ‘Connection name’ field to do so.
- Advanced Settings (Optional): There’s an option labeled ‘Show advanced settings’. If you’re knowledgeable about custom app client credentials, you can enter them here. If not, it’s okay to skip this step. To generate these credentials, refer to Zoom’s ‘Create Custom App and Client Credentials’ guide.
- Lock in Your Settings: Ensure all your settings are saved by clicking the ‘Save’ button.
- Authorize with Zoom: A window might pop up prompting you to confirm access to your Zoom account. Follow the steps, authenticate, and click ‘Allow’ or the equivalent option to grant access.

And that’s it! You’re now connected. This integration lets you manage, monitor, and modify meetings, webinars, and more right from Make’s platform. Should you be keen on exploring further functionalities, do give the Zoom API documentation a glance.


